In the field of oral surgery, precision and atraumatic technique are paramount. While forceps are often the most recognizable tools for tooth extraction, the instruments that truly enable a smooth and controlled procedure are dental elevators. These specialized tools are designed to sever the tooth's attachment to the bone, expand the socket, and luxate the tooth, paving the way for a predictable and minimally traumatic removal.
This comprehensive guide delves into the world of Dental Elevators exploring their anatomy, classification, biomechanical principles, and the essential techniques required for their safe and effective use in modern dental practice.
What Are Dental Elevators?
A dental elevator is a handheld surgical instrument used to loosen teeth and remove roots from the alveolar bone. Unlike forceps, which grip the visible crown of the tooth, elevators work by inserting a thin blade into the periodontal ligament (PDL) space—the fibrous tissue that anchors the tooth to the bone. By applying controlled mechanical force, the instrument tears these fibers and displaces the tooth within its socket, making extraction significantly easier.
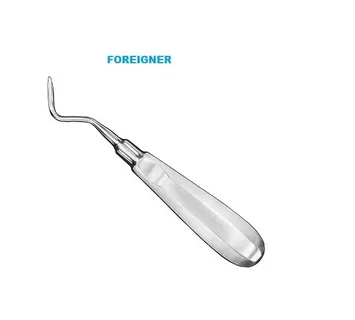
Every dental elevator, regardless of its specific design, shares three fundamental components:
-
The Handle: Ergonomically designed to provide a secure, non-slip grip, allowing the clinician to apply controlled force with maximum tactile feedback.
-
The Shank: The connecting segment between the handle and the blade. Its length and angle determine the instrument's reach and its ability to access different areas of the oral cavity, from anterior teeth to posterior molars.
-
The Blade (or Tip): The working end of the instrument. It features a concave surface designed to hug the root of the tooth and a convex surface that rests against the alveolar bone, ensuring force is directed appropriately.
The Primary Functions of Elevators
Understanding the specific role of an elevator during an extraction is crucial for selecting the right instrument and applying the correct technique. Elevators serve four main functions:
-
Luxation: This is the primary function. By inserting the blade into the PDL space and applying rotational force, the instrument tears the elastic fibers that anchor the tooth to the bone, effectively dislodging it.
-
Elevation (Leverage): Using the principle of the lever, the elevator lifts the tooth coronally out of the socket. The alveolar bone acts as the fulcrum for this action.
-
Root Fragment Removal: Fine-tipped elevators are indispensable for engaging and delivering fractured root tips that lie below the crest of the bone, where forceps cannot reach.
-
Tooth Sectioning: In multi-rooted teeth, strong elevators are driven into the furcation to separate the roots. This converts a complex extraction into simpler, individual root removals.
Classification of Dental Elevators
Dental elevators come in a wide array of shapes and sizes, each engineered for a specific clinical scenario. They are generally classified into three main categories based on their mechanical action and design.
1. Simple Elevators (The Wedge Principle)
These instruments operate on the simplest mechanical concept: the wedge. The blade is gently driven into the PDL space, and as it moves apically, its tapered shape forces the tooth to move coronally.
-
Coupland's Chisels: Numbered 1, 2, and 3, these are workhorse instruments for initial luxation. They have a flat or slightly concave tip and are excellent for expanding the alveolar crest and initiating movement on teeth with significant decay.
2. Compound or Lever-Action Elevators (The Wheel and Axle)
This is the most frequently used category of elevators in clinical practice. They utilize the "wheel and axle" principle, where a rotational force applied to the handle is translated into a powerful, controlled movement at the blade tip.
-
Cryer's Elevators: Characterized by a triangular, pointed blade designed to fit into the bifurcation or trifurcation of multi-rooted teeth. A gentle twisting motion engages one root, allowing for elevation.
-
Potts Elevators: Similar to Cryer's but with a more pronounced, U-shaped concavity, making them particularly effective for engaging the furcation of lower molars.
-
Winter's Elevators: Featuring a gently curved, sturdy blade, Winter's elevators are incredibly versatile. They are often used for posterior teeth, applying force against the alveolar bone to luxate the tooth mesially or distally.
3. Root-Tip or Apexo Elevators (The Fine-Tipped Principle)
These are delicate, precision instruments designed for the challenging task of retrieving fractured root apices. Their fine, sharp tips are meant to navigate the narrow space of a deep socket without damaging the surrounding bone.
-
Heidbrink Elevators: These come in various angles—straight, left, and right—allowing the surgeon to approach a root tip from the most accessible direction. The tip is worked into the PDL space around the fragment to gently tease it out.
-
Miller's Elevators: Similar to Heidbrink, these are fine-tipped and used for delicate root fragment retrieval.
Specialty Elevator Patterns
Beyond the standard classifications, several named patterns have become essential components of the oral surgery armamentarium due to their unique designs and specialized functions.
The Apical Set (Warwick James Pattern)
This set typically includes three instruments: a straight elevator, and left and right angled elevators. Characterized by a fine, slightly curved, and pointed blade, Warwick James elevators are the gold standard for root tip removal. The angled variants allow the surgeon to engage a root from the mesial or distal side while maintaining a clear, unobstructed line of sight.
The Hospital Pattern (Barry Elevators)
These are larger, heavier, and more robust instruments designed for complex surgical procedures. They feature longer shanks, which provide increased leverage and allow the surgeon to reach deeply impacted teeth. Barry elevators are indispensable for surgical extractions requiring significant force for bone expansion and tooth displacement.
Periosteal Elevators
While technically used for reflecting soft tissue rather than elevating teeth, the periosteal elevator is an indispensable part of any surgical extraction tray. It is used to create and reflect a mucoperiosteal flap, exposing the underlying bone and tooth structure. The Molt #9 is the most common example, featuring a sharp, pointed end for initial incision of the periosteum and a broad, rounded end for reflecting the full-thickness flap.
Mastering the Technique: Principles of Safe Elevation
Effective use of a dental elevator relies on finesse and a deep understanding of biomechanics, not brute strength.
-
Protection is Paramount (The Finger Guard): The index finger of the non-dominant hand must always be placed alongside the blade. This acts as a stop, preventing the instrument from slipping and causing catastrophic injury to the tongue, floor of the mouth, or cheek if it suddenly dislodges.
-
Establish the Correct Fulcrum: The alveolar bone surrounding the tooth is the intended fulcrum. Never use an adjacent healthy tooth as a fulcrum unless it is also planned for extraction. Doing so will irreversibly damage the healthy tooth's PDL and bone.
-
Perfect the Point of Application: The concave blade must be firmly seated into the interproximal PDL space, with the concave surface facing the tooth and the convex surface against the bone. This ensures the force is directed into the tooth, luxating it away from the bone.
-
Rotate, Don't Pry: The safest and most effective motion is a gentle, back-and-forth rotation (approximately 30 degrees each way). This rotary motion, or "wheel-and-axle" principle, tears the PDL fibers and elastically expands the bone. Aggressive prying motions place immense stress on the bone and significantly increase the risk of fracture.
-
Work Sequentially: Use the elevator circumferentially around the tooth. Start mesially, then move to distal, buccal, and lingual, gradually working the tooth loose from all attachments.
Common Errors and How to Avoid Them
Even with the correct instrument, technical errors can lead to complications. Here are the most common pitfalls:
-
Inadequate Seating: Failing to seat the blade fully into the PDL space and instead placing it superficially on the crown. When rotated, this snaps the crown off, leaving the roots behind.
-
Excessive Force: If the tooth does not move with controlled rotation, do not apply more force. Re-evaluate. You may need to create more space with a surgical bur or consider sectioning the tooth.
-
Incorrect Fulcrum: As mentioned, using an adjacent tooth as a fulcrum causes irreversible damage to that tooth.
-
Neglecting Soft Tissue Protection: Skipping the finger guard is the most common cause of iatrogenic soft tissue lacerations during elevation.
Conclusion
Dental elevators are the cornerstone of modern oral surgery. Their design, ranging from simple wedges to complex compound levers, reflects the intricate nature of tooth removal. Mastering these instruments requires more than just memorizing names like Cryer's, Winter's, or Warwick James; it demands a thorough understanding of the mechanical principles they employ and the biological tissues they interact with.
By combining this knowledge with controlled, deliberate technique and an unwavering commitment to patient safety, dental professionals can ensure that extractions are performed with maximum efficiency and minimal trauma. In the hands of a skilled practitioner, the dental elevator is truly a tool of surgical finesse.
Frequently Asked Questions (FAQs)
1. What is the difference between a dental elevator and a dental luxator?
While both are used for loosening teeth, they have different blade designs. A dental elevator typically has a slightly rounded or triangular blade designed for leverage and tearing the PDL. A luxator has a very thin, sharp, and flat blade designed to be driven deeper into the PDL space to actually cut the fibers. Luxators are often used for initial engagement, while elevators are used for the subsequent luxation and elevation.
2. How do I choose the right elevator for a specific tooth?
The choice depends on the tooth's anatomy and location. For large multi-rooted molars, a sturdy Cryer's or Potts elevator is ideal for engaging the furcation. For single-rooted teeth, a Winter's or a straight elevator works well. For thin, delicate root tips, a fine apical elevator like a Heidbrink or Warwick James is necessary to avoid fracturing the root further.
3. Why are some dental elevators angled?
Angled elevators, such as the left and right Warwick James or specific Cryer's patterns, are designed to provide optimal access and engagement depending on which side of the mouth you are working on. An angled instrument allows you to approach the mesial or distal aspect of a root from a comfortable operating position without obstructing your view, ensuring the concave blade properly hugs the root surface.
4. What should I do if a tooth is not loosening with an elevator?
If a tooth is not loosening with controlled rotational force, do not force it. Stop and reassess the situation. You may need to use a smaller elevator to gain better purchase in the PDL space. Alternatively, you may need to create more space by using a surgical bur to remove some bone (osteotomy) or to section the tooth into smaller, more manageable pieces.
5. Can elevators damage the adjacent tooth?
Yes, they can if used improperly. This is often referred to as "indirect damage." It typically occurs when a surgeon uses an adjacent healthy tooth as a fulcrum instead of the alveolar bone. To prevent this, the fulcrum must always be the bone surrounding the tooth being extracted, and finger rests must be used to control the instrument's path of displacement.